

From Waste to Watermelon: How I Helped a Vancouver Family Grow Sweet Summer Fruit in Their Own Backyard
By Darrell Smith – DH Garden Centre & DH Landscape Solutions, Vancouver, BC

You’re not failing. You’re just feeding the wrong soil and planting at the wrong time. Let me show you how to grow watermelon the right way, here in Vancouver.
Growing watermelon at home in Vancouver sounds like a gardener’s fantasy. With our short summers, cooler nights, and unpredictable climate, many believe it’s impossible. But what if I told you it’s not only possible—it’s absolutely worth doing?
Let me share a true story that started with compost, a few worms, and a dream. It ended with ripe, juicy watermelons harvested in a Kitsilano backyard.
One spring morning, a customer walked into DH Garden Centre with a frustrated look. She said, “Darrell, I’ve tried to grow watermelon twice. Both times, the vines died before they even flowered. I’m thinking it just can’t grow here.”
I smiled, because I’ve heard this story many times. And every time, the ending can be rewritten—with the right soil, timing, and care.
I said, “You’re not failing. You’re just feeding the wrong soil and planting at the wrong time. Let me show you how to grow watermelon the right way, here in Vancouver.”
That conversation turned into a three-month journey—and what she learned might change how you see gardening forever.
Step One: Building Living Soil, Not Just Dirt
The success of watermelon starts long before you sow a seed. It starts with soil—not just any soil, but one that is alive with organic matter and beneficial microbes.
Here’s how we built that foundation from scratch.
We started with a compost blend made of:
-
70 percent garden soil
-
30 percent composted cow dung
-
10 percent rice husks for improved aeration
To this base, we added kitchen garbage: banana peels, carrot tops, coffee grounds, eggshells, and leftover greens. Then we introduced a biological booster: Trichoderma fungus.
Trichoderma is a powerful decomposer. It accelerates the breakdown of organic waste and improves soil health by introducing beneficial fungi that outcompete harmful pathogens.
We turned the compost pile every three days to ensure airflow. Within 15 days, the temperature rose, and the mix began to smell earthy—not rotten.
This wasn’t just compost. It was a microbial ecosystem in motion.

The success of watermelon starts long before you sow a seed. It starts with soil—not just any soil, but one that is alive with organic matter and beneficial microbes.
Step Two: The Banana Trick and Worm Power
By day 40, we added overripe bananas to the mix and released a small army of red wiggler worms.
These compost worms are nature’s soil builders. As they consumed the banana and other organic matter, they produced worm castings—a dark, crumbly material rich in nitrogen, phosphorus, potassium, and beneficial bacteria.
Over the next three weeks, the worms worked through the compost. The result was a rich, living soil amendment that looked like chocolate cake and smelled like the forest floor after rain.
This compost didn’t just feed plants. It transformed the entire soil environment.
By day 68, our soil was ready to support watermelon seedlings.
Choosing the Right Watermelon for Canadian Conditions
When it comes to growing watermelon in Canada, variety selection is critical. You want compact, fast-maturing types that don’t need 120 days of intense heat.
These are my top recommendations:
-
Sugar Baby: Small, round fruit with deep red flesh; matures in 75–80 days.
-
Golden Midget: Turns golden when ripe, excellent for short seasons.
-
Blacktail Mountain: Developed in Idaho, thrives in cooler climates.
We started the seeds indoors in early May using biodegradable pots filled with our homemade compost mix. The seeds were soaked overnight to encourage faster germination.
After sprouting, the seedlings were kept under grow lights in a warm room until the end of May, when the soil temperature outside consistently reached 20°C or higher.
That’s when we transplanted them into raised beds covered with black plastic mulch.
When it comes to growing watermelon in Canada, variety selection is critical. You want compact, fast-maturing types that don’t need 120 days of intense heat.
Creating the Right Growing Environment
Here’s the part many people overlook: watermelons love heat. In Vancouver, where nights are cool and spring arrives slowly, we have to create a microclimate.
The black plastic mulch served two purposes:
-
It warmed the soil by several degrees.
-
It prevented weeds, conserving the plant’s energy.
We planted each seedling three feet apart in full sun, preferably on a south-facing wall for additional warmth.
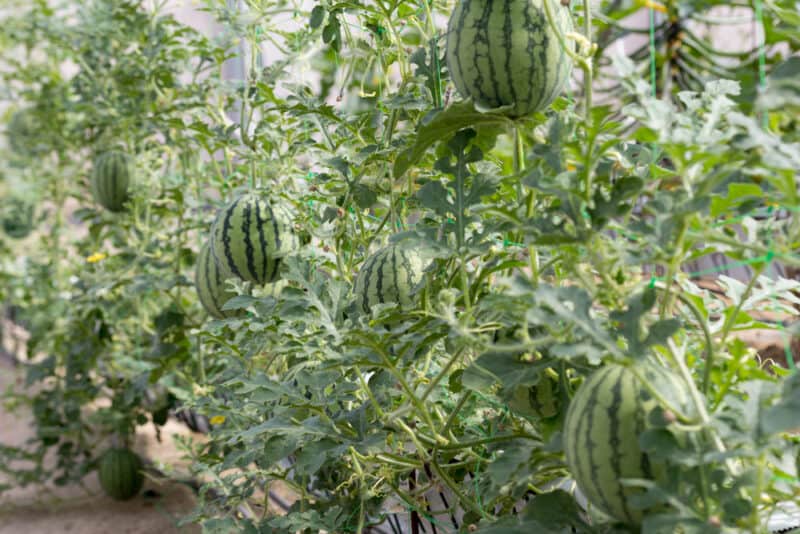
For smaller spaces, vertical growing works well. We installed a trellis and used soft netting to support the fruit once it formed.
Watering was deep but infrequent. We watered at the base, avoiding the leaves to reduce the risk of powdery mildew. As the fruit began to swell, we reduced watering slightly to concentrate the sugars.
To ensure pollination, we encouraged bees with companion flowers like nasturtiums and calendula. In some cases, we hand-pollinated using a soft brush.

For smaller spaces, vertical growing works well. We installed a trellis and used soft netting to support the fruit once it formed.
From Flower to Fruit: Patience and Pruning
Within 25 days of transplanting, we saw the first flowers. Male flowers arrived first, followed by the female ones a week later.
We limited each plant to one or two fruits by pinching off extra vines and flowers. This focused the plant’s energy on ripening a few perfect melons instead of several mediocre ones.
By day 60, the fruit had formed. By day 85, it was time to check for ripeness.
These are the signs we watched for:
-
The tendril closest to the fruit turned brown and dry
-
The belly spot (where the fruit touches the ground) changed to a creamy yellow
-
The fruit sounded hollow when tapped
And then—it was time.
The Harvest: A Backyard Miracle
She harvested two striped, soccer-ball-sized Sugar Baby melons. The color was rich, the scent unmistakable.
Her young son took the first bite. Juice dripped down his chin as he smiled wider than I’d ever seen.
She emailed me that night.
“Darrell, I can’t believe it. I thought I was failing at gardening. But today, we grew our own watermelon in Vancouver. Thank you for showing me that it’s not about luck—it’s about soil and love.”
This is why I do what I do.
:max_bytes(150000):strip_icc()/how-to-grow-watermelons-1403491-hero-2d1ce0752fed4ed599db3ba3b231f8b7.jpg)
Growing watermelon: it’s not about luck—it’s about soil and love.
Why This Story Matters
This story isn’t just about growing watermelon. It’s about reclaiming your space, your food, and your confidence.
It’s about realizing that the food you feed your family doesn’t have to come from 1,000 kilometers away. It can come from your backyard, your balcony, your raised bed.
It starts with waste. It grows through effort. And it ends with nourishment—of body, heart, and soul.
Watermelon is a warm-weather crop. But the determination to grow it is timeless.
Final Tips for Growing Watermelon at Home in Vancouver
-
Start seeds indoors in early May
-
Transplant after the soil reaches 20°C, usually late May or early June
-
Use rich compost with cow dung, kitchen waste, and worm castings
-
Cover beds with black plastic mulch for warmth
-
Space 3 feet apart; support with a trellis if needed
-
Limit fruits per vine for better quality
-
Watch for ripening signs at 75–90 days
And most importantly—don’t give up after one failure. Soil can always be rebuilt. So can your belief in your own gardening hands.
Visit DH Garden Centre – We’re Here to Help You Succeed
If you’re ready to grow your own watermelon—or any crop, really—visit us in Kitsilano.
We carry composted cow dung, worm castings, Trichoderma fungi, heirloom seeds, and everything else you need to succeed.
And if you’re still unsure where to start, just come talk to me. We’ll walk the soil journey together.
DH Garden Centre
3742 West 10th Avenue, Vancouver, BC V6R 2G4
604-929-7335
dhgardencentre.com
Instagram & Facebook: @dh.garden.centre
YouTube: The Plant Doctor Official
Let’s turn your garden into a place of wonder, starting from the ground up.