

Learn how to start a small indoor worm bin using a 2-gallon tote. Detailed expert guide on setup, bedding, feeding, moisture control, and worm care, plus FAQs, pro tips, and common mistakes to avoid for successful vermicomposting at home.
How to Start a Small Indoor Worm Bin: A Step-by-Step Expert Guide
If you want to recycle your kitchen scraps, build incredible soil, and still live in a small space, a tiny indoor worm bin is one of the smartest systems you can set up.
You do not need a big, complicated worm farm to get started. In fact, the system in this guide uses a 2-gallon Rubbermaid container, about 500 worms, and household materials you probably already have: cardboard, newspaper, and food scraps.
This article walks you through the exact process:
-
How to set up a small bin correctly
-
How damp your bedding should be (with a clear squeeze test)
-
How little food to add at the beginning
-
How to read your bin after six days
-
When and how to give the second, larger feeding
-
How to manage moisture and keep conditions stable indoors
By the end, you will know how to start and run a new worm bin with confidence not guessing, not overfeeding, and not creating a smelly mess
Step 1: Set Up Your Worm Bin Before You Ever Order Worms
The biggest beginner mistake is ordering worms before the bin is ready. Worms are livestock; they need a prepared home waiting for them.
For this system, we use a two-gallon Rubbermaid container that has already been run several times. It’s simple, durable, and the small size forces you to stay disciplined with feeding.
Add ventilation holes and mesh
Drill multiple small holes around the upper sides of the bin. Then:
-
Cover each line of holes from the inside with mesh screen
-
Secure the mesh with duct tape
This setup has been shown to last almost two years without failing. The mesh keeps worms in and pests out, while the holes allow air exchange so the bin stays aerobic and odor-free.
If your bin has a lid (and it should), drill holes in the lid as well and cover them with the same mesh and tape. For an indoor bin, this extra airflow is helpful, especially when the lid is on most of the time.
At this point you have:
-
A small, sturdy container
-
Side and lid ventilation with mesh and tape
-
A system that’s been proven to work for multiple cycles
Only after your bin is ready should you move on to bedding and, later, worms.
Step 2: Prepare and Inoculate Your Bedding
Bedding is not just “filler.” It is:
-
The worms’ living environment
-
Their primary food source at the beginning
-
Your main tool for moisture and pH control
Choose and shred your bedding
For this style of bin, the main ingredients are:
-
Shredded cardboard (corrugated is ideal)
-
A smaller amount of shredded newspaper
A crosscut micro-shredder (12-sheet) works best. It turns material into very small pieces, which:
-
Break down faster
-
Hold moisture more evenly
-
Are easier for worms to move through and consume
The finer the shreds, the better your early vermicompost will perform.
Inoculate with microbes
You want microbial life active in the bedding before the worms arrive. Options include:
-
A handful of finished vermicompost from an older bin
-
A bit of garden soil (risk: you may introduce other critters)
-
A small amount of regular compost
If you have none of these, don’t panic. Worms arrive with microbes on their bodies. But inoculating the bedding gives you a head start and helps break down food more quickly.
Moisten to “damp,” not soaked
Add water, rainwater is excellent, until the bedding passes the squeeze test:
-
Pick up a handful and squeeze hard
-
You want one or two drops to emerge, not a stream
That is the perfect moisture level for starting a worm bin: damp, springy, but not dripping.
You can do this a few hours before, or several days to two weeks before your worms arrive. The bedding can sit in a tote while you wait, slowly coming to biological life.
Finally, add enough bedding to your bin to fill it about halfway. For a 2-gallon container, that gives plenty of depth while leaving room for food and worms.
Step 3: Order Your Worms (After the Bin Is Ready)
Once your bin and bedding are prepared, you’re ready to get worms either:
-
From a trusted supplier, or
-
From a neighbor’s established bin
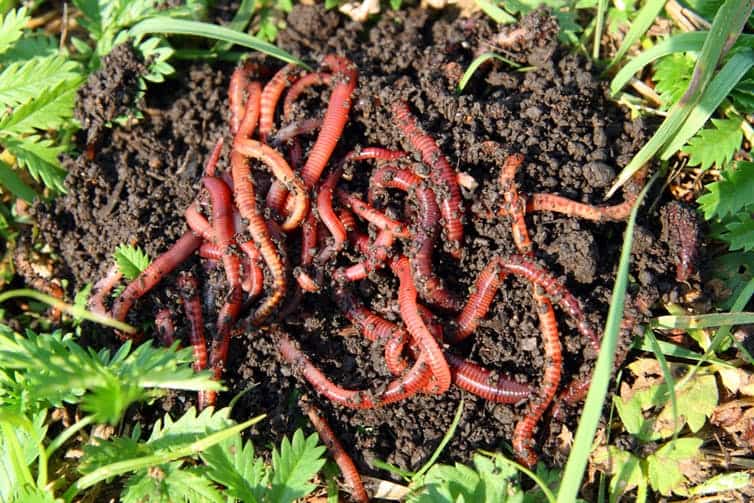
For a 2-gallon setup, 500 worms is a solid starting population. In many cases they come mixed in with some bedding or peat-like material.
If worms arrive in a dry medium (like peat), lightly mist the top of the worm bag or tray to help rehydrate them before adding to the bin. If they come from another active bin, they’ll already be nicely moist and acclimated.
At this stage, do not add more food. You want a high bedding-to-food ratio while the worms settle in.
Step 4: First Feeding, How Little Is “Little”?
This is where most new worm keepers go wrong. They love their worms and “welcome” them with far too much food. That creates excess moisture, fermentation, ammonia smell, and sometimes a mass escape attempt.
In this bin, the first feeding for 500 worms is intentionally tiny:
-
One small piece of lettuce
-
Four strawberry tops, previously frozen then thawed
Why strawberry tops?
-
The juicy flesh around the top breaks down quickly and feeds the worms early
-
The green cap decomposes more slowly, acting as a marker you can check later
After thawing, place the food in a single small pocket, then bury it in the bedding. Burying:
-
Masks odors
-
Prevents fruit flies
-
Encourages worms to explore the bedding to find food
Do not add coffee grounds, worm chow, grit, or other amendments yet. The goal of this first feeding is simply:
-
To “invite” worms to their new home
-
To show you, six days later, whether they’re eating well
Once the food is buried, gently level the bedding.
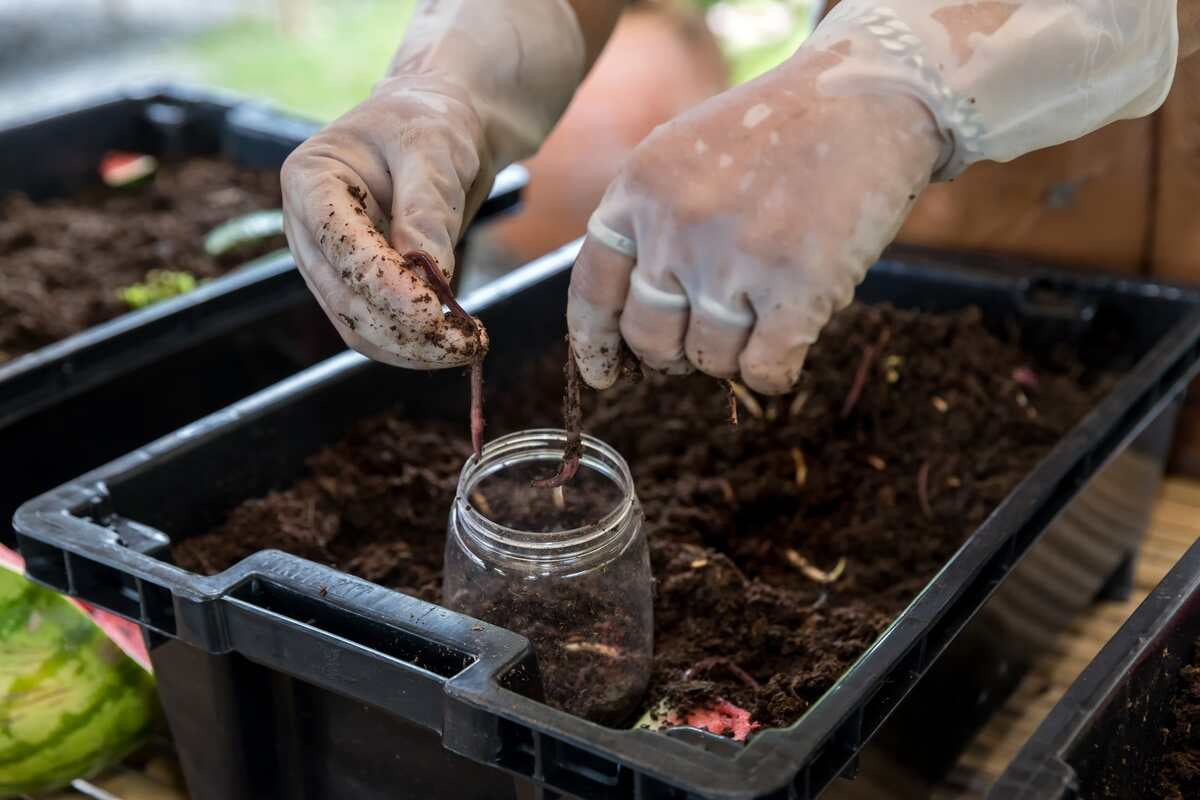
Step 5: Add the Worms and Create the Right “Signals”
Now comes the fun part: adding your 500 worms to their new home.
Spread them gently across the surface. You may see:
-
Worms mixed with bits of old bedding
-
Moist clumps of compost clinging to them
To help them move down into the bin and stay there:
-
Place a sheet of newspaper over the surface.
-
Add a piece of plastic or bubble wrap on top.
-
Leave the bin lid off for 48 hours.
-
Keep the bin in a room with the light on continuously during that period.
This does two things at once:
-
The light and the dry air at the top signal: “Down is safe, up is not.”
-
The plastic holds moisture that condenses and falls back, preventing the bedding from drying too fast.
After 48 hours, you can place the lid on. From this point, the bin mostly runs itself for several days.
Step 6: The Six-Day Check – Reading the Bin
Six days after setup is an ideal time for your first inspection.
When you open the bin, you may notice:
-
The newspaper and edges of the bedding are a bit dry (normal)
-
The center still has good moisture
-
A faint smell of wet cardboard, but not “earthy” yet (that comes later as castings build up)
Gently dig into the feeding spot:
-
Look for the strawberry tops
-
The pink fruit portion should be completely gone
-
Only the green cap, slow to decompose, may remain
You might see just a stem from the lettuce, with the softer parts eaten away. That’s exactly what you want: it means the worms are:
-
Finding the food
-
Processing it completely
-
Not leaving behind smelly, fermenting patches
While you’re in the bin, take the opportunity to aerate the bedding:
-
Loosen and fluff the cardboard
-
Bring slightly drier material from the corners into the center
-
Check moisture, everything should feel damp, not dusty and not soggy
You will also start seeing worms scattered throughout, not just at the surface. That’s a sign they are exploring and comfortable.
Because they’ve finished their first tiny feeding, you are now ready for the second, slightly larger feeding.
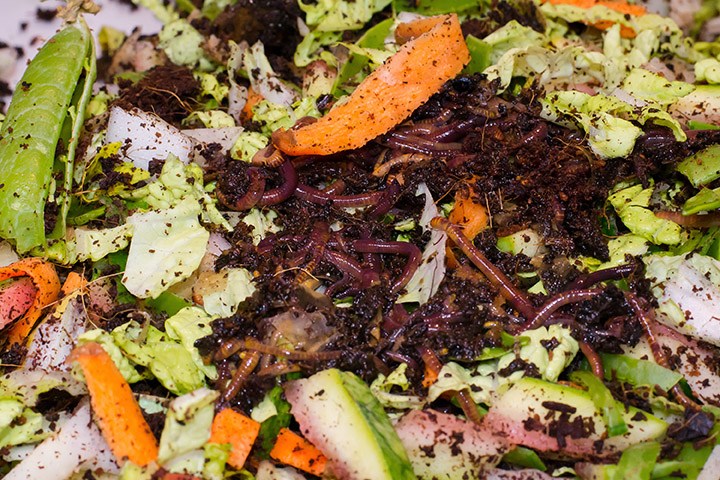
Step 7: Second Feeding – Scaling Up Carefully and Adding Amendments
After aeration, add a small layer of fresh, damp shredded cardboard. Then build the second feeding:
-
A few more pieces of lettuce
-
Several strawberries and raspberries
-
One banana peel (their first “slow” food)
Note: banana peels decompose more slowly and can create a soggy patch if used too early. That’s why they’re introduced only after you know the worms are eating reliably.
Now you can also add amendments in tiny amounts:
-
Finely ground “worm chow” made from expired grains
-
A bit of dry, pre-aged coffee grounds
-
A dusting of eggshell grit for their gizzards
These are not essentials, but they offer:
-
Extra surface area for microbes
-
Additional nutrient variety
-
Mechanical help for the worms’ digestion
Again, everything is buried under bedding and then covered with newspaper and plastic. From here, you’ll wait 7-10 days before the next check, watching how quickly this larger feeding disappears.
The guiding principle:
It’s always safer to feed a little less than you think they need, rather than a little more.
Overfeeding leads to fermentation, ammonia, and stress for the worms. Underfeeding just slows castings production slightly and worms are incredibly good at eating bedding in the meantime.
Moisture Management in an Indoor Bin
Indoor bins, especially in summer with air conditioning running, tend to dry out at the top. The newspaper + plastic system is a simple way to:
-
Trap evaporating moisture
-
Condense it on the plastic
-
Let it fall back into the bedding
Signs your bin is properly hydrated:
-
Bedding feels cool and damp
-
Worms are comfortable throughout the bin, not clumped only at the bottom or in one wet corner
-
No standing water, no sour smell
If it feels too dry, lightly mist the top and edges. Never pour water straight in, bedding can only absorb so much before excess water drops to the bottom and creates anaerobic conditions.
Key Principles for Starting a Tiny Worm Bin
This small-bin method illustrates a few core vermicomposting principles:
-
Set up first, order worms second.
-
High bedding, low food at the beginning is safer.
-
Use small feedings and observe how quickly they’re eaten.
-
Freeze and thaw food scraps to speed up breakdown and reduce pests.
-
Balance fast foods and slow foods (juicy fruit vs. banana peels and stems).
-
Use grit sparingly to support digestion.
-
Manage moisture with covers, not constant watering.
Follow these and your bin will transition from “wet cardboard” smell to that deep, earthy scent of mature vermicompost over the coming weeks.
Call to Action: Start Your Own 2-Gallon Worm Bin
You don’t need a garage, a garden shed, or a big backyard to start vermicomposting.
All you need is:
-
A 2-gallon tote
-
Shredded cardboard and newspaper
-
A bit of patience
-
Around 500 composting worms
Set up the bin, give them a tiny first feeding, and let the system build itself up. In a few months, you’ll be harvesting your own worm castings and closing the loop on your kitchen scraps right inside your home.
Start small. Learn the rhythm. Then scale up when you’re ready.
FAQs: Small Indoor Worm Bin for Beginners
Q1. How long before I see real worm castings?
You’ll start seeing dark, crumbly castings within 4–6 weeks, but a full harvest from a new 2-gallon bin usually takes 3-4 months.
Q2. My bin smells like sour fruit, what did I do wrong?
That’s a sign of overfeeding or overly wet food. Mix in extra dry bedding, stop feeding for a week, and gently fluff the bin to add air.
Q3. Can I keep the bin in my bedroom or kitchen?
Yes, if you don’t overfeed and keep it aerobic, the bin should smell like damp forest soil, not garbage.
Q4. Why leave the lid off for the first 48 hours?
The combination of constant light and drier air teaches worms to stay down in the bedding. It dramatically reduces escape attempts in new setups.
Q5. How often should I feed after the second feeding?
Check the feeding area every 7-10 days. When the previous food is mostly gone and the surface looks flat and uniform, it’s safe to feed again.
Q6. What happens if the top layers dry out?
Simply mix the drier material toward the center during your next check and lightly mist. As long as the core stays damp, the bin will recover.

3742 West 10th Avenue, Vancouver, BC V6R 2G4, Canada
Whether you’re shopping for plant lovers, hunting for meaningful plants, or simply looking to add a touch of green to your own holiday décor, DH Garden Centre has everything you need for a joyful, vibrant, and beautifully green Christmas.
Visit DH Garden Centre today: where the holidays grow brighter, one plant at a time.