
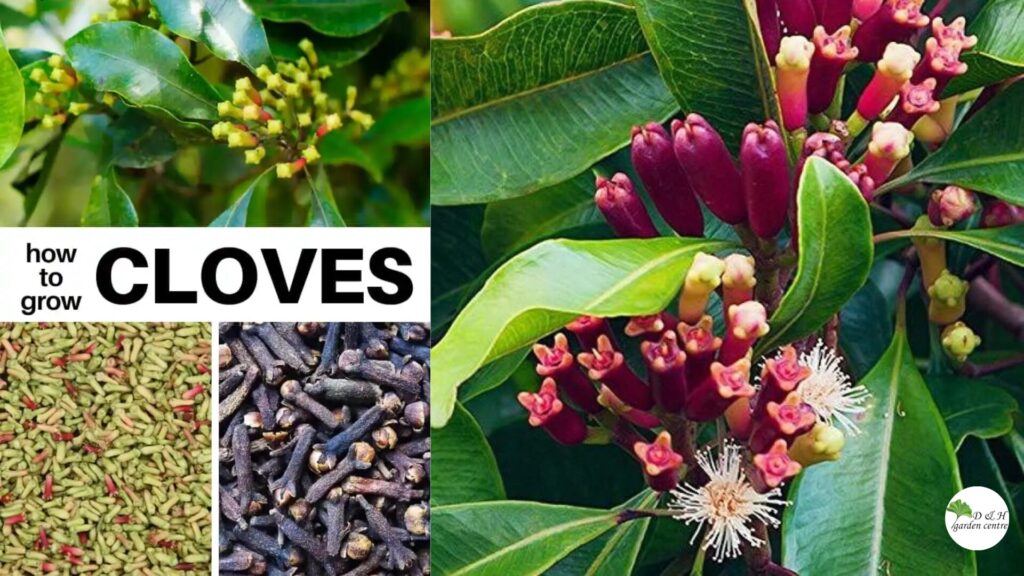
Learn how to grow clove tree from seed with this complete 8-step guide. Includes soil mix, planting instructions, humidity tips, seedling care, transplanting, troubleshooting, and expert pro tips for healthy long-term growth.

Introduction: Why Growing a Clove Tree From Seed Is Worth the Effort
Growing a clove tree from seed is not just gardening; it is a quiet investment in time, care, and patience.
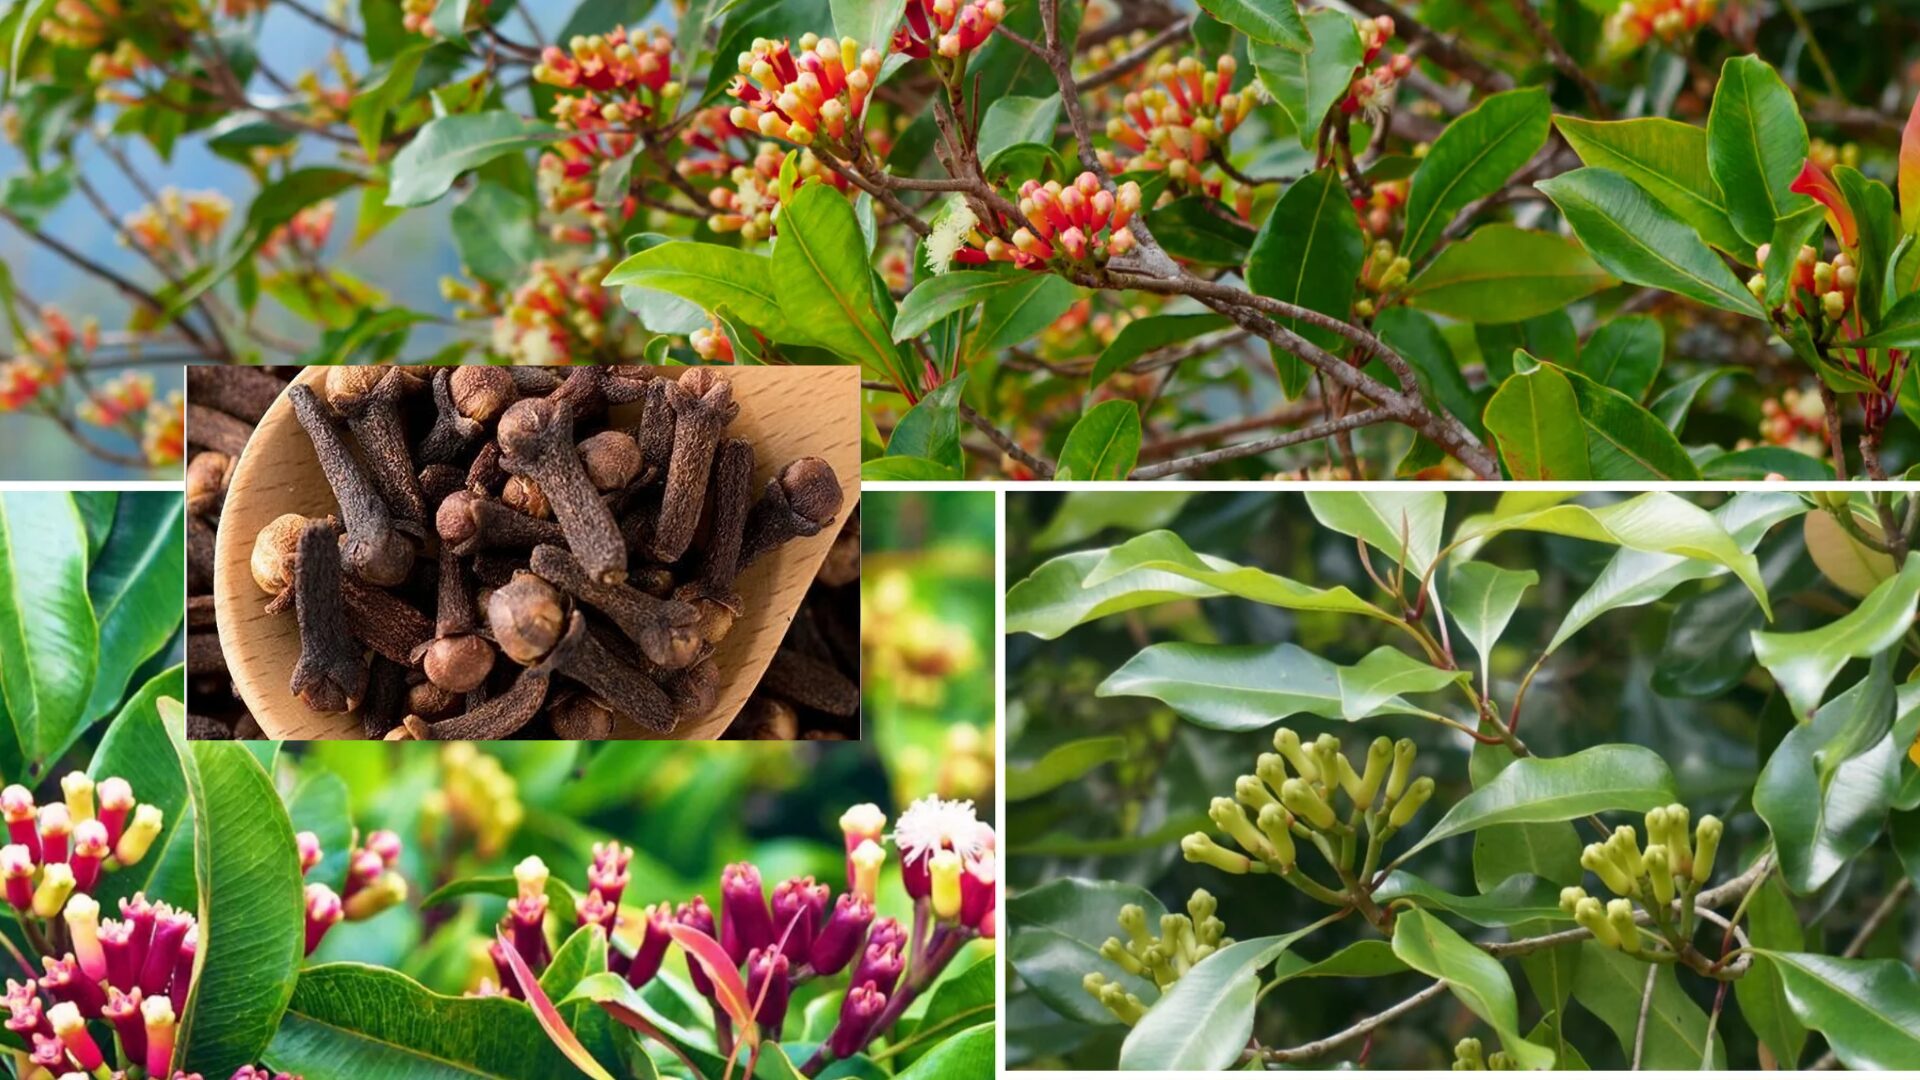
Cloves,those aromatic dried flower buds used in cooking, tea, herbal medicine, and holiday baking, come from Syzygium aromaticum, a tropical evergreen native to the legendary Maluku Islands.
Growing this tree from seed is fully achievable for home gardeners, but only if you understand how fresh, fragile, and demanding clove seeds truly are. This comprehensive guide will walk you through every step, from identifying viable seeds to caring for a mature tree.
Whether you live in a tropical climate or plan to grow cloves indoors, this step-by-step tutorial ensures you succeed on your first attempt.
1. Understanding Clove Seeds: Why Freshness Determines Everything
Clove seeds are extremely short-lived. Unlike vegetable or flower seeds that store well for years, clove seeds lose viability within a few days after harvest.
Why store-bought cloves never germinate
The cloves sold in markets are not seeds; they are dried flower buds. They have been roasted by the sun and processed, making them incapable of sprouting.
How to tell if your clove seeds are still alive
Fresh seeds should be:
-
Soft and plump
-
Moist or slightly glossy
-
Never hard or brittle
Pro Tip:
If the seed feels dry or hollow, it is already dead. Clove seeds must be planted fresh, ideally within 48–72 hours of harvest.
2. Preparing Clove Seeds for Planting
Before planting, proper seed preparation dramatically improves germination success.
Step-by-step seed prep
-
Rinse the seeds to remove remaining pulp.
-
Soak seeds in lukewarm water for 6-12 hours.
-
Remove any seeds that float, they are likely non-viable.
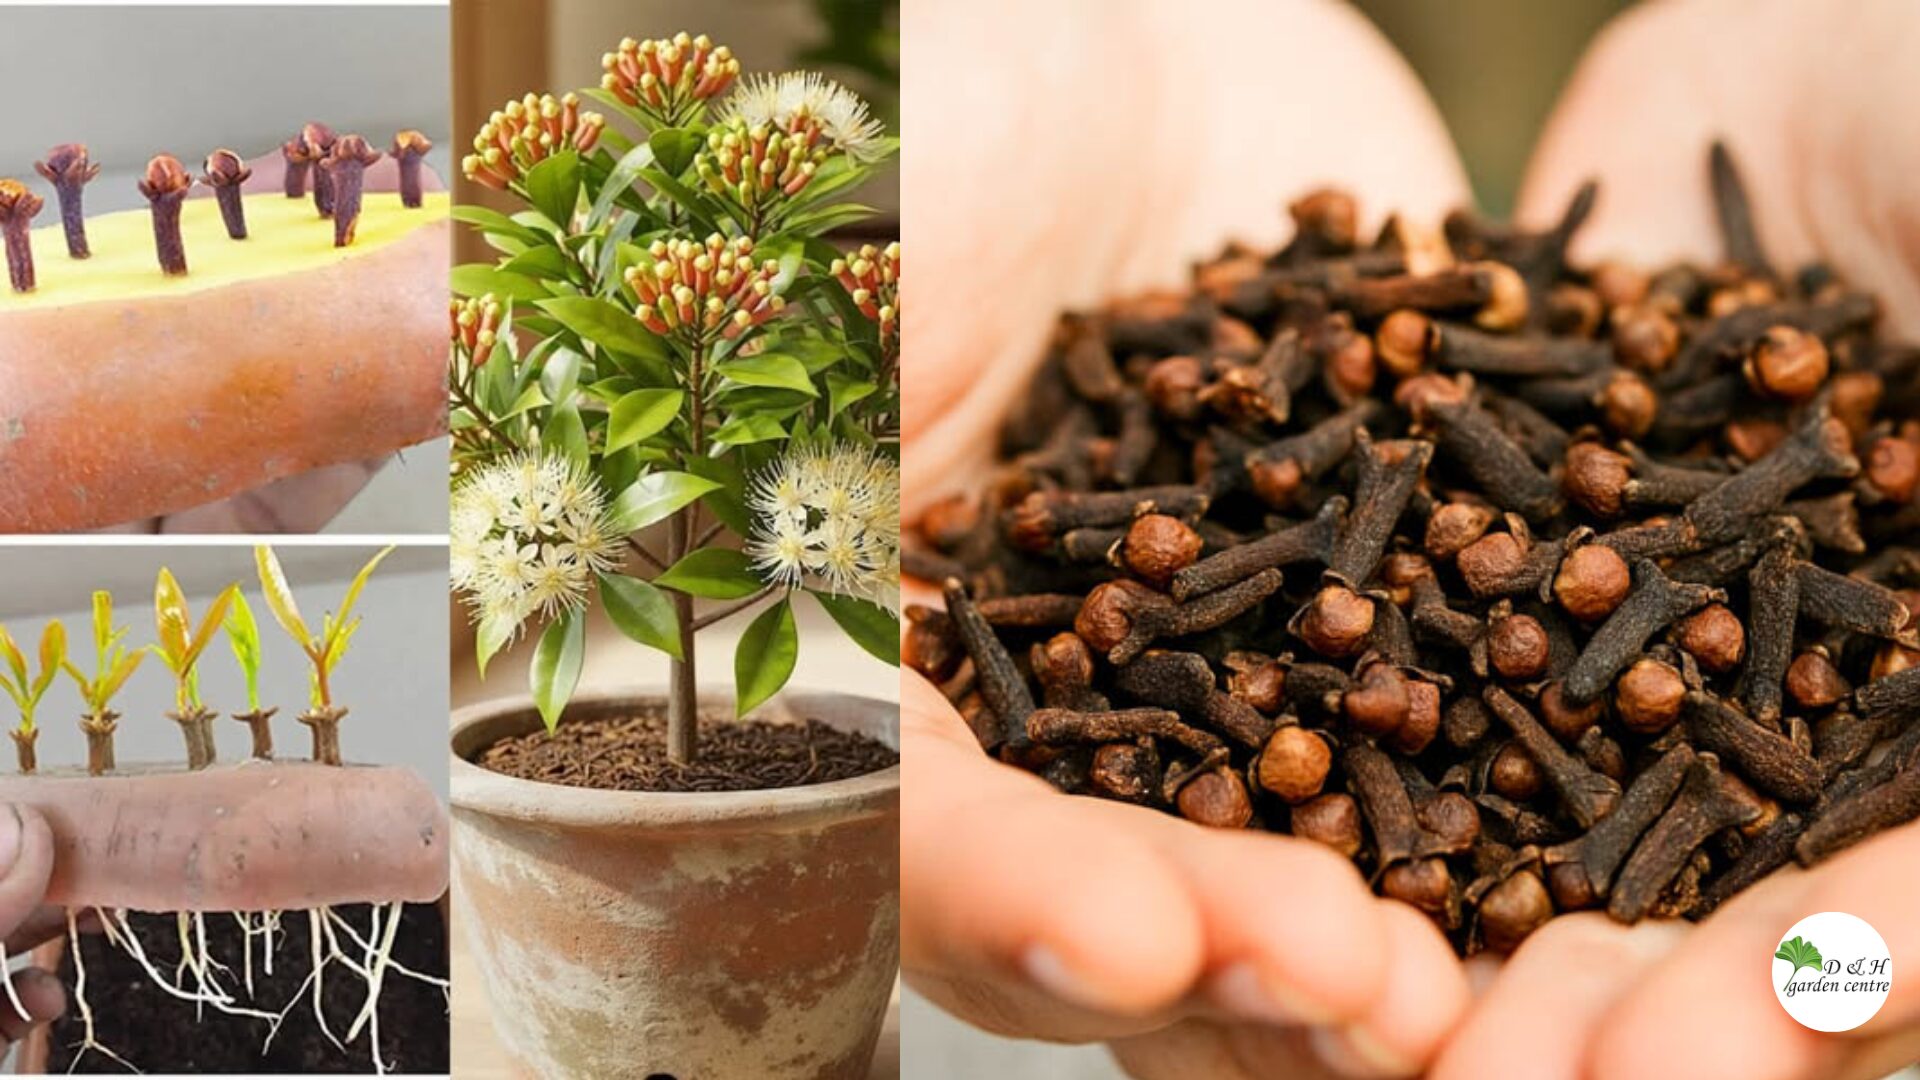
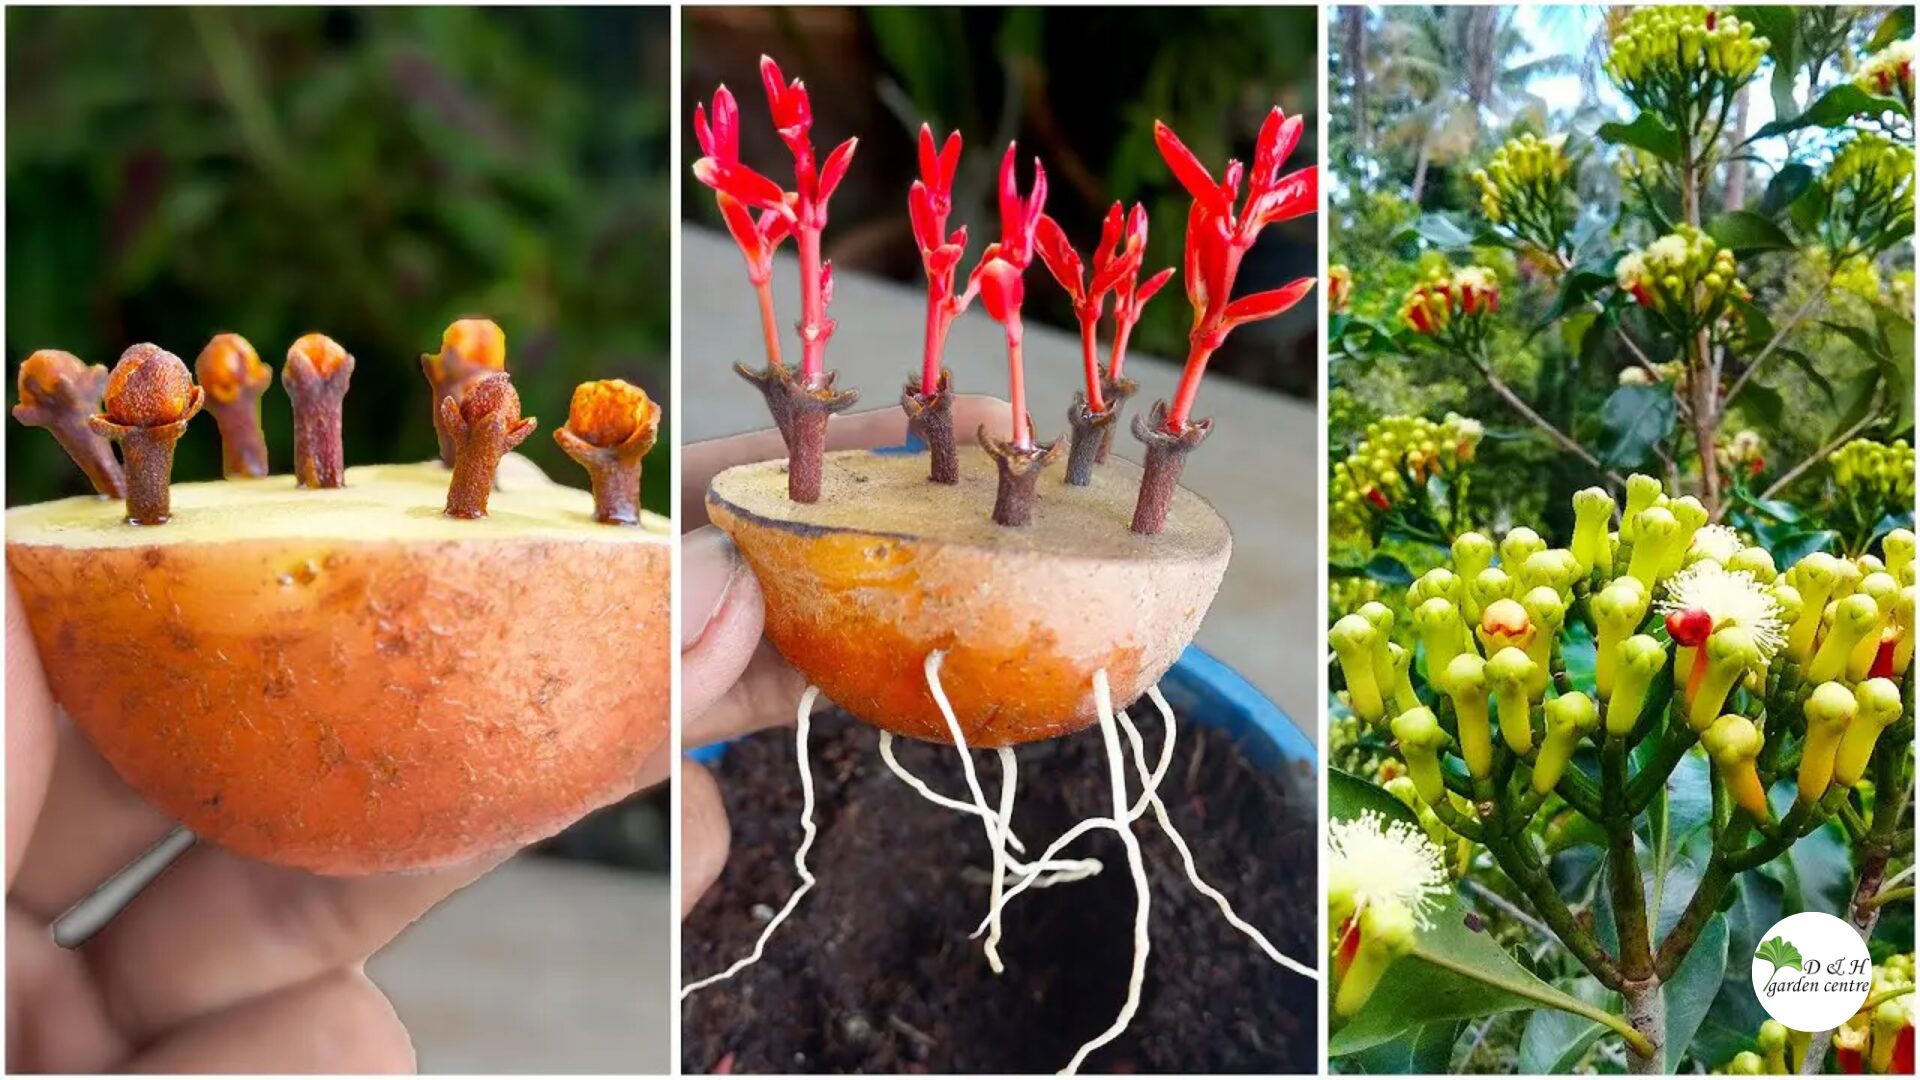
Early germination inside the fruit
Clove seeds sometimes begin germinating inside their fruit.
This is a good sign.
Pro Tip:
If you see a tiny root emerging, plant the seed immediately. Do not try to detach or reposition the root.
3. Choosing the Ideal Growing Medium for Clove Seeds
Clove trees demand soil that retains moisture but never becomes waterlogged.
Recommended soil mix
-
50% compost or coco peat
-
30% sand or perlite
-
20% garden soil
This blend creates a medium that is:
-
Airy
-
Moisture-retentive
-
Fast-draining
Pro Tip:
Heavy clay soil suffocates clove embryos and causes instant rot. Always choose a loose, breathable medium.
4. How to Plant Clove Seeds the Right Way
Plant each seed about 1 inch (2.5 cm) deep.
If you can identify the pointed end, keep it facing upward.
Ideal germination conditions
-
Warm temperature: 24–32°C (75–90°F)
-
High humidity
-
Filtered sunlight or shade
-
Moist but not soggy soil
To maintain humidity, cover the pot with:
-
A plastic dome, or
-
A transparent bag
But remember to allow airflow daily to prevent mildew.
Pro Tip:
Humidity is your biggest ally. The more stable your humidity level, the faster and healthier your seedlings will grow.
5. Caring for New Clove Seedlings
Clove seedlings grow slowly during the first few months.
Expect sprouting in 2-6 weeks.
Essential seedling care
-
Keep the soil evenly moist.
-
Provide indirect light (never direct sun).
-
Maintain warm indoor temperatures.
-
Mist the leaves occasionally to increase humidity.
Pro Tip:
Direct sunlight at this stage can scorch tender leaves. Shade keeps them safe and hydrated.
6. Transplanting Clove Seedlings Into Larger Containers
Once your seedlings reach 4-6 months with several true leaves, it’s time to transplant them.
Potting instructions
-
Choose deep pots, their roots grow downward.
-
Use the same airy, moisture-balanced soil mix.
-
Gradually increase exposure to light.
-
Avoid fully harsh sunlight until the plant is over 1 year old.
Clove trees love slightly acidic soil
Ideal pH: 5.5–6.5
If your soil is alkaline, amend it with:
-
Peat moss
-
Pine bark
-
Organic compost
Pro Tip:
Do not transplant too early. Cloves develop slowly; premature movement causes shock.
7. Long-Term Growth: What to Expect From a Mature Clove Tree
Once established, a clove tree becomes a gorgeous evergreen with glossy leaves and aromatic buds.
Long-term care requirements
-
Warmth: never below 10°C (50°F)
-
Humidity: above 60%
-
Light: partial sun to gentle full sun
-
Watering: consistent moisture, never standing water
-
Feeding: organic fertilizer every 6–8 weeks
Timeline to clove production
A healthy tree begins producing flower buds around 4-7 years after planting.
Mulching is essential
Add organic mulch around the base to:
-
Retain moisture
-
Suppress weeds
-
Keep root temperature stable
Pro Tip:
Never pile mulch against the trunk; keep a small gap to avoid rot.
8. Common Problems and How to Avoid Them
Even when grown carefully, clove trees have specific sensitivities.
Root Rot
Cause: Overwatering or poor drainage.
Solution: Use airy soil and pots with multiple drainage holes.
Leaf Burn
Cause: Full, intense sun on tender leaves.
Solution: Provide shade or filtered light.
Slow Growth
Cause: Natural growth pattern + insufficient heat or humidity.
Solution: Maintain warm conditions and humidity above 60%.
Pro Tip:
Indoor growers should use a humidifier or pebble tray. Cloves thrive in tropical moisture.
Conclusion: Growing a Clove Tree Is a Rewarding Journey
A clove tree is a long-term companion, slow to mature, but beautiful, resilient, and wonderfully aromatic.
Once you understand how sensitive the seeds are and how much they rely on warmth and humidity, the process becomes surprisingly manageable.
If you’re patient and attentive, you’ll eventually enjoy your own homegrown cloves, an impressive achievement for any gardener.
Ready to Grow Your Own Clove Tree?
If you found this guide helpful, explore more deep-dive tutorials on tropical gardening, rare spices, and indoor tree cultivation.
Share this post with fellow gardeners or save it for your next planting project.
FAQ: Frequently Asked Questions About Growing Clove Trees From Seed
1. Can I grow a clove tree indoors?
Yes, as long as you provide warm temperatures, bright filtered light, and high humidity.
2. How long do clove seeds stay viable?
Only 2–5 days after harvest. They must be planted fresh.
3. Why aren’t my clove seeds sprouting?
Common reasons include:
-
Seeds were too old
-
Soil stayed too wet
-
Temperature was too low
4. How long before a clove tree produces buds?
Typically 4–7 years, depending on climate and care.
5. Can I grow a clove tree in a cold climate?
Yes, but only indoors or in a heated greenhouse. Cloves cannot tolerate frost.
6. What pests affect clove trees?
They are generally resistant, but young trees may encounter:
-
Scale
-
Aphids
-
Fungus if humidity is stagnant

Whether you’re shopping for plant lovers, hunting for meaningful plants, or simply looking to add a touch of green to your own holiday décor, DH Garden Centre has everything you need for a joyful, vibrant, and beautifully green Christmas.
Visit DH Garden Centre today: where the holidays grow brighter, one plant at a time.